Key Takeaways
- Attics, walls, and basements each lose heat differently, so the smartest upgrades target the biggest offenders first rather than treating every surface equally
- Fiberglass batts, blown-in cellulose, and spray foam all have strengths and weaknesses — the right pick depends on your climate, budget, and the specific area being insulated
- Air sealing often delivers a bigger comfort boost per dollar than adding more insulation on top of leaky gaps
- R-value targets vary by climate zone, and under-insulating a cold-climate attic wastes money every single winter
- DIY projects make sense for accessible spaces like attics and rim joists, while enclosed walls and crawl spaces usually call for a professional
- Weighing upfront cost against long-term energy savings matters more than chasing the cheapest or most premium option
- Small weatherization steps like weatherstripping and outlet gaskets stack up to real savings when combined with bulk insulation upgrades
Why Insulation Matters More Than Any Other Winter Upgrade
When the temperature drops and the furnace kicks on constantly, most homeowners reach for the thermostat first. That’s the expensive habit. The real problem usually isn’t the heating system — it’s the invisible envelope around your house that’s letting warm air escape as fast as you can produce it.
Insulation is one of those upgrades that doesn’t feel glamorous. You can’t show it off like a new kitchen or a deck. But it quietly affects every utility bill you pay from October through March, and it determines whether your living room feels cozy or drafty on a 20-degree night. Getting it right pays back for decades.
The tricky part is that “better insulation” isn’t one decision. It’s a dozen smaller choices about materials, locations, R-values, and whether you hire someone or do it yourself. This article compares the major options side by side so you can figure out where your dollars will actually matter.
Where Your House Loses the Most Heat

Before you spend a dime, you need to know where the leaks are. Not all parts of a home lose heat equally, and spending money on the wrong area is one of the most common winterization mistakes.
The attic is almost always the top offender. Heat rises, and if there’s no barrier up there, it keeps rising right out of your house. According to the U.S. Department of Energy, as much as a quarter of a home’s heat can escape through an uninsulated attic. That single statistic should shape how you prioritize every other project.
Walls come next, followed by floors over unheated spaces, windows, and finally the small gaps around doors, pipes, and electrical penetrations. Here’s a rough ranking of where to look first:
- Attic floor and access hatch
- Exterior wall cavities, especially on the north side
- Rim joists and basement band boards
- Crawl spaces and floors above unheated garages
- Window frames, door sweeps, and duct penetrations
- Electrical outlets on exterior walls
If you’re wondering how to winterize your home without wasting effort, start at the top of that list and work down. The order matters more than the brand of insulation you choose.
Comparing the Main Insulation Materials
This is where most people get stuck. Fiberglass batts, blown-in cellulose, spray foam, mineral wool, rigid foam board — the options sound interchangeable until you look closer.
Fiberglass batts are the cheapest and easiest for DIYers. They install fast in open stud bays and unfinished attic joists. The downside is that they’re only as good as the installation. Gaps, compressions, and sloppy cuts drop their real-world performance significantly. If you’ve ever pulled back a batt and found a palm-sized gap on each side, you’ve seen why.
Blown-in cellulose fills irregular cavities better and handles existing attics well because you can add it on top of what’s already there. Spray foam — especially closed-cell — is the premium option. It air-seals and insulates in one step, which is a huge advantage, but it costs two to three times more than the alternatives.
How to Match Material to Location
Think of it this way. Open attic floors love blown-in cellulose. New construction wall cavities do well with batts or dense-packed cellulose. Rim joists, crawl spaces, and oddly shaped gaps are where spray foam earns its price tag. Basement walls often make sense with rigid foam board because it resists moisture.
Mixing materials is normal and often smart. Nobody says you have to pick one for the whole house. The best projects use the right product in each location rather than forcing one solution everywhere.
Air Sealing Versus Adding More Insulation
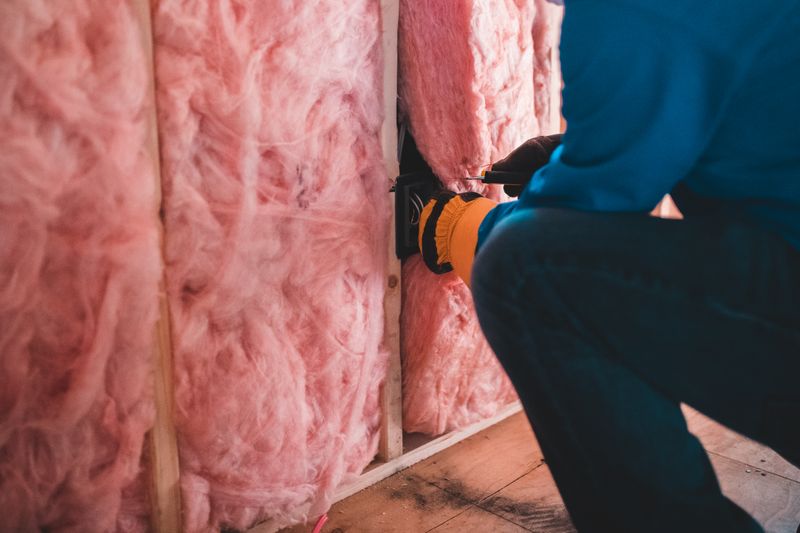
Here’s an underrated truth: insulation and air sealing do different jobs, and one without the other is half a solution. Insulation slows heat transfer. Air sealing stops the actual drafts. A thick layer of fiberglass over a leaky attic floor is like wearing a heavy coat with the zipper wide open.
The payoff from combining both is significant. According to EPA/ENERGY STAR, homeowners can cut roughly 15% off heating and cooling bills by sealing air leaks and adding insulation together. That number assumes you do both — not one or the other.
Sealing priorities worth tackling first:
- Top plates and wire penetrations in the attic
- Recessed light cans (use airtight-rated covers)
- Chimney and flue chases
- Rim joists in the basement
- Gaps around plumbing stacks and bath vents
- Door thresholds and weatherstripping
Routine home maintenance checks each fall should include running a hand along baseboards and outlets on windy days. If you feel a draft, you’ve found money leaking out. Sealing those spots with caulk, foam, or weatherstripping is cheap and fast compared to major insulation work.
Matching R-Value to Your Climate Zone
R-value measures how well insulation resists heat flow. Higher is better, but more isn’t always necessary — and underdoing it in a cold climate is a serious mistake that keeps costing you every winter.
The recommended attic R-values run from R30 to R60 for an uninsulated attic depending on where you live, and R25 to R49 if you already have three to four inches up there. That’s a wide range. A home in Minnesota needs far more than one in Georgia, and loading up the attic beyond your zone’s recommendation is a diminishing return.
Climate zone maps are easy to find, but here’s the quick logic. Colder zones need thicker attic insulation, better wall systems, and more attention to basement and crawl space heat loss. Warmer zones can get away with less in the attic but should still focus on air sealing. Matching the R-value to the actual zone — rather than copying whatever your neighbor did — is one of the smartest decisions you can make.
When R-Value Isn’t the Whole Story
Two batts with the same R-value don’t always perform the same. Density, air sealing, moisture resistance, and settling over time all affect long-term results. Cellulose settles. Fiberglass can sag in walls if it’s not supported properly. Spray foam holds its R-value better over decades but comes with a higher upfront cost.
Think of R-value as the starting point for comparison, not the final answer. A well-installed R38 attic will outperform a sloppy R50 every time.
Smart Approaches to Winterizing Your Home
With the basics covered, the real question becomes what order to tackle projects in. A thoughtful approach weighs cost, disruption, and payback period — not just raw material price.
Start with the cheapest high-impact wins. Weatherstripping, outlet gaskets, attic hatch insulation, and caulking around penetrations usually cost under a few hundred dollars combined and deliver noticeable comfort improvements almost immediately. These projects don’t require pulling permits or opening walls, which is why they’re the right first move for almost any household.
Next, move to the attic. Adding blown-in cellulose or fiberglass on top of existing insulation is one of the highest-ROI upgrades in residential construction. A single weekend of work, or a half-day with a contractor, can push an attic from R19 to R49 — a transformation your furnace will feel within days.
Wall insulation is trickier. Retrofitting existing walls means either drilling holes for dense-pack cellulose or opening drywall for batts, and the disruption pushes most people toward professional installers. It’s still worth doing in older homes with hollow cavities, but the payback stretches longer than attic work.
Knowing When to Call a Pro
Some projects reward DIY effort. Others punish it. Attic top-ups, rim joist foam board, weatherstripping, and outlet gaskets are all reasonable weekend jobs if you’re comfortable with basic tools and willing to wear a respirator.
Closed wall cavities, crawl spaces with moisture issues, spray foam applications over a few hundred square feet, and anything involving knob-and-tube wiring should go to a licensed contractor. The cost of doing these wrong — trapped moisture, rotted sheathing, fire hazards — far exceeds what you’d save by trying to tackle them yourself. Insulation problems hide inside walls for years, and they belong in the same category as hidden home system failures that quietly drain thousands before anyone notices.
A good contractor will also do a blower-door test to find leaks you’d never spot by hand. That diagnostic alone often justifies the hire, because it tells you exactly where to spend your sealing budget instead of guessing.
Budgeting the Project Without Overspending
Insulation upgrades span an enormous price range. A DIY attic top-up might run $400 in materials. A whole-house spray foam retrofit can cross $15,000. Most homeowners land somewhere in between, and the sweet spot usually involves staging work over two or three seasons.
Here’s a rough framework for thinking about spend:
- Under $500: weatherstripping, caulk, outlet gaskets, attic hatch kit, pipe insulation
- $500 to $2,500: attic blow-in top-up, rim joist sealing, basic basement rim insulation
- $2,500 to $7,500: professional attic overhaul, crawl space encapsulation, targeted wall dense-pack
- $7,500 and up: whole-house spray foam, full wall retrofits, major envelope work
Don’t forget to check for rebates. Utility companies and state energy programs often cover a meaningful chunk of insulation and air sealing costs, sometimes 30 to 50 percent. A quick search for your utility’s name plus “insulation rebate” usually turns up current offers.
Financing matters too. Many contractors offer payment plans tied to projected energy savings, so the monthly cost of the upgrade roughly matches the monthly utility reduction. That structure turns a big project into something that pays for itself from day one.
Conclusion
Preparing a house for cold weather isn’t about one big purchase — it’s about understanding where heat actually escapes and attacking those spots in the right order. The attic almost always comes first, air sealing runs alongside every insulation decision, and material choice should match the location rather than a blanket preference. Get those three principles right, and you’ve already outpaced most homeowners in your neighborhood.
The financial case is just as strong as the comfort case. Lower bills every month, a furnace that cycles less and lasts longer, rooms that stay warm without cranking the thermostat, and a house that’s easier to sell when the time comes. None of those benefits show up in a single dramatic moment. They accumulate quietly, winter after winter, which is exactly what makes insulation one of the most underrated investments you can make in a property.
Take a walk through your house this week with a notepad. Check the attic depth, run your hand along the baseboards, peek at the rim joists in the basement. The list you come back with will tell you where to start — and once you begin crossing items off, you’ll wonder why you waited so long to deal with any of it.