As the leaves fall and the chill of winter approaches, it’s time for homeowners to focus on preparing their properties to handle the demands of colder weather. Failing to properly maintain your home during this transitional period can lead to costly repairs, higher energy bills, and unnecessary stress during the winter months. This guide provides a detailed breakdown of essential post-fall maintenance tasks that can protect your home, save you money, and ensure comfort through the cold season.
1. Enhance Insulation for the Cold
When it comes to preparing your home for winter, insulation is often the unsung hero of energy efficiency. Proper insulation acts as a barrier to heat loss, ensuring your home stays warm and your heating system operates efficiently. Gaps or inadequate insulation can lead to cold drafts, uneven room temperatures, and higher utility bills as your heating system works overtime to maintain a comfortable indoor climate. Collaborating with local industrial insulation contractors is the smartest way to address these issues, as their expertise ensures your home is well-equipped to handle the cold.
Why Insulation Matters
- Reduces Heat Loss:
- Insulation traps heat inside your home, preventing it from escaping through walls, ceilings, and floors. This minimizes the amount of energy required to maintain a comfortable temperature.
- Improves Comfort:
- Properly insulated homes eliminate cold spots and drafts, creating a consistent and cozy indoor environment.
- Saves Money:
- By reducing the strain on your heating system, insulation lowers energy consumption, which can significantly reduce your utility bills.
- Environmentally Friendly:
- Energy-efficient homes have a smaller carbon footprint, contributing to a more sustainable future.
Steps to Improve Insulation
1. Inspect Existing Insulation
The first step to improving your home’s insulation is a thorough inspection of existing materials to identify problem areas.
- Attic:
- Inspect for sagging or uneven insulation layers. Look for exposed joists or areas where the insulation has settled or degraded over time.
- Use a flashlight to check for any gaps where light or air might be passing through.
- Walls:
- Feel for cold drafts around outlets, windows, or doors.
- Contractors may use thermal imaging to detect areas of heat loss within the walls.
- Basement and Crawl Spaces:
- Check for moisture or mildew, as this can indicate poor insulation or ventilation.
- Exterior:
- Inspect areas around windows, doors, and vents for visible cracks or gaps that may allow heat to escape.
A detailed inspection will help contractors identify areas where insulation is inadequate or missing, ensuring no spot is overlooked.
2. Choose the Best Insulation Material
The type of insulation used depends on the specific needs of your home. Local industrial insulation contractors can recommend the most effective materials for different areas of your property.
- Spray Foam Insulation:
- Ideal for hard-to-reach spaces, spray foam expands to fill gaps and cracks, providing an airtight seal.
- Best for sealing areas like around window frames, plumbing, and HVAC ducts.
- It also acts as a moisture barrier, reducing the risk of mold growth.
- Fiberglass Insulation:
- A cost-effective solution, fiberglass comes in batts or rolls that are easy to install in open spaces like attics and walls.
- It’s excellent for areas where the insulation layer needs to cover large surfaces.
- Cellulose Insulation:
- Made from recycled materials, cellulose is an eco-friendly option. It’s typically blown into walls or attics, providing excellent coverage.
- Rigid Foam Boards:
- Used for exterior walls or foundations, these boards offer high thermal resistance and are durable against moisture and pests.
Choosing the right material ensures maximum efficiency and durability for your insulation.
3. Seal Air Leaks
Even the best insulation won’t perform well if your home has unsealed air leaks. These gaps can allow warm air to escape and cold air to enter, undermining the effectiveness of your heating system.
- Common Areas for Air Leaks:
- Around windows and doors
- Attic hatches and vents
- Electrical outlets and light fixtures
- Plumbing and HVAC penetrations through walls
- Sealing Techniques:
- Use caulk to seal small gaps and cracks, especially around windows and doors.
- Apply weatherstripping to door frames to prevent drafts.
- For larger gaps, contractors may use spray foam or rigid foam boards.
By sealing air leaks in conjunction with upgrading insulation, you’ll achieve a more airtight and energy-efficient home.
4. Ensure Proper Ventilation
While sealing gaps is crucial, maintaining proper ventilation is equally important to prevent moisture buildup and maintain air quality. Without adequate ventilation, insulated areas may trap humidity, leading to mold growth and structural damage.
- Ventilation in Attics:
- Install ridge vents or soffit vents to allow air to circulate freely. This prevents condensation and reduces the risk of ice dams during winter.
- Ventilation in Crawl Spaces:
- Use vapor barriers and ensure there’s proper airflow to keep moisture levels low.
- Whole-Home Ventilation Systems:
- In some cases, contractors may recommend energy recovery ventilators (ERVs) or heat recovery ventilators (HRVs) to improve indoor air quality while maintaining energy efficiency.
A balanced approach ensures your home remains insulated yet breathable, enhancing overall comfort and safety.
2. Repair Damaged Shingles
Your roof is one of the most critical components of your home’s defense against winter weather. Damaged or missing shingles can lead to water leaks, ice dams, and structural issues that are costly to fix. Hiring a local roofing contractor ensures your roof is inspected and repaired properly before the snow falls.

Steps to Secure Your Roof:
- Conduct a Visual Inspection:
- From the ground, look for missing, cracked, or curled shingles. Also, check for granules in your gutters, a sign of shingle wear.
- If you’re comfortable, use a ladder to inspect the roof up close, but consider hiring a local roofing contractor for a more thorough assessment.
- Schedule a Roof Inspection:
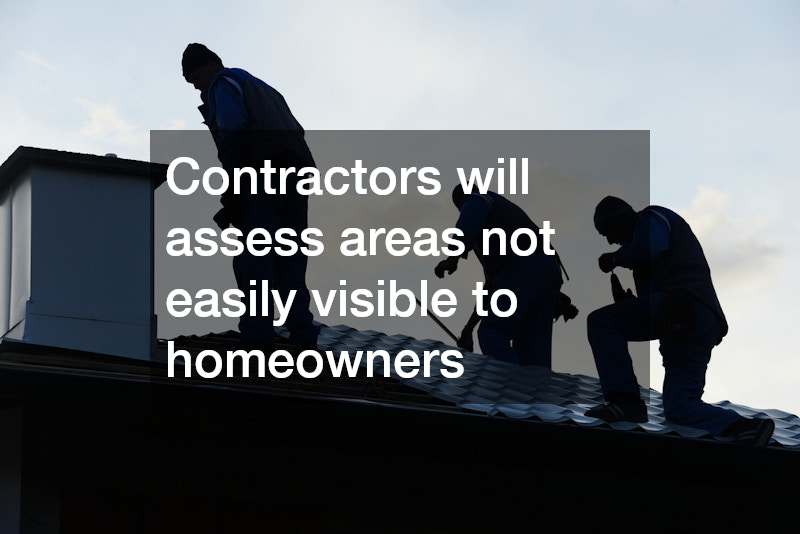
- Contractors will assess areas not easily visible to homeowners, such as valleys, flashing, and chimneys, where leaks are most likely to occur.
- Repair or Replace Shingles:
- Damaged shingles are replaced with new ones that match your roof’s existing style. For larger sections of damage, a contractor may recommend partial replacement.
- Reinforce Flashing and Seals:
- Ensure areas around vents, chimneys, and skylights are sealed to prevent water infiltration.
- Clean the Roof Surface:
- Removing debris such as leaves and twigs prevents moisture retention, which can accelerate roof damage during freezing temperatures.
By taking these steps, you avoid expensive emergency repairs and extend the lifespan of your roof.
3. Install Gutter Upgrades to Prevent Drainage Issues
Blocked gutters are a common cause of winter water damage. When gutters clog, water overflows and can damage your home’s foundation, siding, and roof. Installing gutter guards with the help of gutter guard companies prevents these issues and ensures water flows freely, even during heavy snowmelt.
Steps to Optimize Your Gutter System:
- Clear Out Existing Debris:
- Remove leaves, sticks, and other debris from gutters using gloves and a gutter scoop. Rinse with a garden hose to flush out remaining dirt.
- Inspect for Damage:
- Check for cracks, sagging sections, or improperly aligned downspouts. Repair any issues before installing guards.
- Install Gutter Guards:
- Choose from popular types like mesh screens, reverse-curve guards, or brush guards. Mesh screens are particularly effective for keeping out small debris like pine needles.
- Securely attach guards to ensure they can withstand winter weather.
- Ensure Proper Drainage:
- Confirm that downspouts direct water at least five feet away from your home’s foundation to avoid pooling and freezing.
This preventative measure reduces the risk of water damage, ice dams, and gutter repair costs in the future.
4. Address Driveway Cracks
Driveways with cracks or potholes are vulnerable to damage during winter freeze-thaw cycles. Water seeps into these cracks, freezes, and expands, worsening the damage. Proactive asphalt repair or resurfacing by local paving companies ensures a durable, safe surface for winter.
Steps to Maintain Your Driveway:
- Inspect Your Driveway:
- Look for visible cracks, depressions, and uneven areas. Even hairline cracks should be addressed to prevent them from widening.
- Repair Small Cracks Yourself:
- For minor cracks, clean the area with a stiff brush and remove loose debris. Apply an asphalt crack filler using a caulking gun or pourable filler. Smooth it out with a trowel and let it cure.
- Resurface or Repave for Larger Issues:
- If the damage is extensive, hire local paving companies to resurface or replace the asphalt. Resurfacing involves adding a fresh layer of asphalt to restore the driveway’s appearance and function.
- Seal the Driveway:
- Once repairs are complete, apply a sealcoat to protect the surface from moisture, UV rays, and chemicals.
These steps ensure your driveway remains functional and reduces the risk of accidents caused by uneven surfaces or icy patches.
5. Prevent Plumbing Issues before Winter Sets In
Frozen or clogged pipes can cause significant damage during winter. Ensuring your plumbing system is in top condition by using a drain and sewer cleaning service prevents costly repairs and water damage.

Steps to Protect Your Plumbing:
- Schedule a Professional Cleaning:
- Hire a drain and sewer cleaning service to remove blockages caused by grease, debris, or roots. They can use hydro-jetting or specialized tools for thorough cleaning.
- Insulate Vulnerable Pipes:
- Identify pipes in unheated areas like basements, garages, or exterior walls. Wrap them with foam pipe insulation to prevent freezing.
- Test Drain Flow:
- Run water through all drains to ensure there are no slow-moving or clogged areas. Address any issues before freezing temperatures arrive.
- Keep Faucets Dripping During Freezes:
- During extreme cold, allow faucets to drip slightly to keep water moving and reduce the risk of freezing.
These preventive measures save you from the hassle and expense of burst pipes or sewer backups.
6. Test Your Heating System
Your heating system will work overtime during winter, so ensuring it’s in peak condition is essential. Scheduling a heating repair check-up now can identify potential issues and keep your home warm without costly breakdowns.
Steps to Optimize Your Heating System:
- Replace Filters:
- Dirty filters reduce airflow, causing your system to work harder. Replace filters monthly during peak usage periods.
- Inspect Key Components:
- Professionals will check the furnace blower, belts, burner, and heat exchanger for wear or damage.
- Test System Performance:
- Turn on the system and listen for unusual noises or odors. Ensure all rooms heat evenly.
- Consider a Thermostat Upgrade:
- Installing a programmable or smart thermostat can improve efficiency by adjusting temperatures based on your schedule.
Routine maintenance ensures your heating system runs efficiently, extending its lifespan and saving energy.
7. Winterize Your Pool
If you have a pool, preparing it for the off-season is crucial to avoid costly damage from freezing water. Working with a swimming pool maintenance service ensures your pool remains protected throughout winter.

Steps to Winterize Your Pool:
- Clean the Pool Thoroughly:
- Remove leaves, debris, and dirt from the water. Brush and vacuum the surfaces for a clean start.
- Balance Water Chemistry:
- Adjust pH, alkalinity, and calcium hardness to prevent scaling or corrosion. Add winterizing chemicals like algaecides and chlorine.
- Lower the Water Level:
- Drain the water below the skimmer line to prevent freezing in pipes.
- Cover the Pool:
- Use a durable winter cover to keep debris out and protect the pool’s structure.
Proper winterization ensures your pool is ready for an easy reopening in spring.
8. Upgrade Heating Efficiency
For homeowners seeking the ultimate in comfort and efficiency, installing a Variable Refrigerant Flow (VRF) system is a game-changer. A VRF system installer can customize a setup that provides zoned heating and cooling, reducing energy waste.
How VRF Systems Work
At the core of a VRF system is its ability to transfer refrigerant in varying amounts to indoor units. This allows:
- Simultaneous Heating and Cooling: Some VRF systems (heat recovery models) can provide heating in one area while cooling another, ideal for homes with diverse needs.
- Modulated Power Usage: Unlike traditional HVAC systems that operate at full capacity until the desired temperature is reached, VRF systems adjust their output continuously, maintaining steady comfort levels while using less energy.
Steps to Install a VRF System:
- Evaluate Your Needs:
- Discuss your home’s heating and cooling patterns with the installer. VRF systems are ideal for larger homes with diverse temperature needs.
- Plan the Layout:
- The installer will strategically place indoor and outdoor units to maximize efficiency and comfort.
- Install Zonal Controls:
- Each zone can be set to a different temperature, ensuring you only heat the areas you’re using.
- Monitor Energy Savings:
- VRF systems are highly efficient, often reducing energy consumption by 20-30%.
This modern solution offers superior comfort while slashing energy costs.
By following this detailed post-fall cleanup guide, you can ensure your home is well-prepared to withstand winter’s challenges. Investing in these maintenance tasks now will save you money, protect your property, and provide peace of mind through the colder months.


